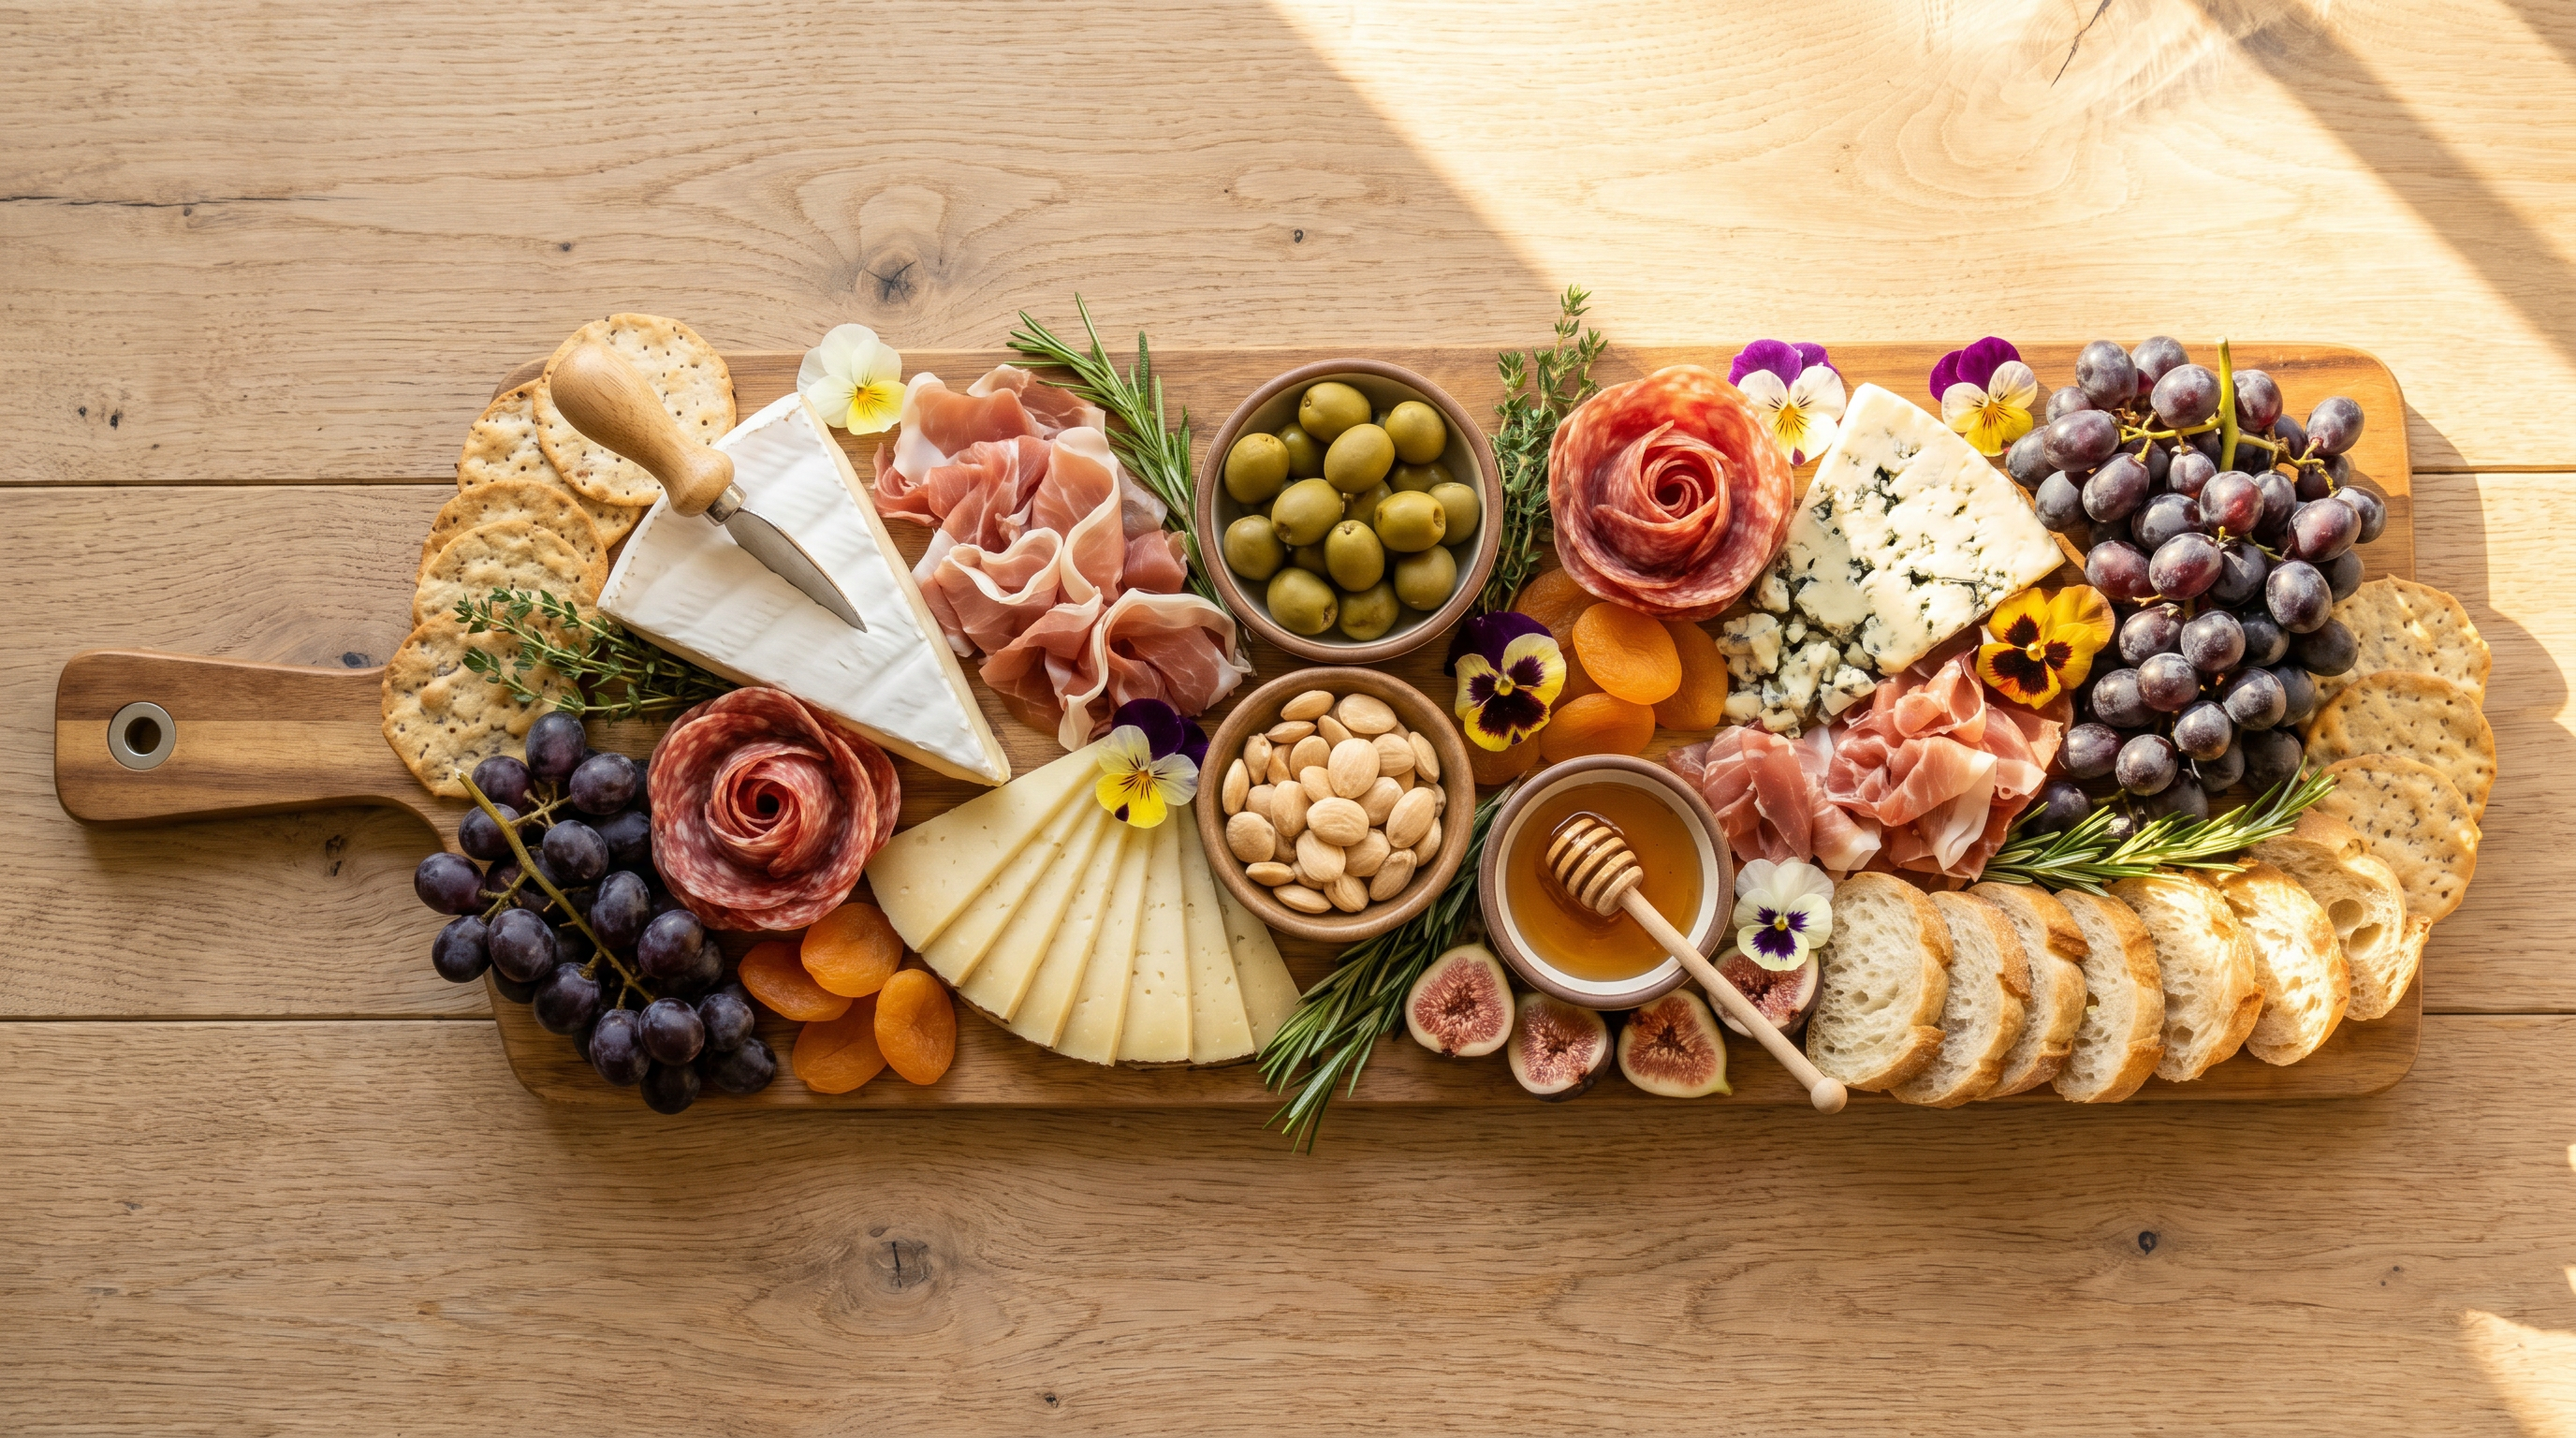
How to Build a Charcuterie Board Like a Pro (Even If This Is Your First One)
You’ve been invited to a summer dinner party. You said you’d bring “something.” Now you’re standing in the grocery store, staring at the cheese case, wondering how normal people turn a wedge of brie and a package of prosciutto into one of those Pinterest-worthy boards that gets its own photo shoot at the party.
Thank you for reading this post, don’t forget to subscribe!
Good news: there’s an actual formula. Charcuterie board building isn’t magic — it’s a handful of simple rules that once you know them, you’ll be making beautiful boards for the rest of your life. Here’s the beginner’s guide that skips the fluff and gets you to a gorgeous, delicious board in under thirty minutes.
Start With the Board Itself
The single biggest upgrade to your charcuterie game happens before you buy a single grape. Your board is your canvas. A grocery-store plastic platter never looks like a magazine spread. A beautiful handcrafted wood board? Anything you pile on it looks intentional.
What to look for in a charcuterie board
- Size: At least 12 inches long for two people; 18 inches or more for four to six
- Shape: Long rectangles are the most flexible and photograph beautifully
- Material: Solid wood (acacia, walnut, or maple) reads as elevated and lasts decades with care
- Personality: A little grain variation or a natural live edge instantly upgrades the presentation
Our long acacia cutting board with handle is one of our most-purchased pieces for exactly this reason — it’s sized for real charcuterie boards, the grain photographs beautifully, and the handle lets you carry the finished spread to the table without disturbing anything. If you want something truly show-stopping, our California epoxy cutting board becomes the centerpiece of the party before you’ve even added the cheese.
The Charcuterie Board Formula (Memorize This)
Every great board follows the same basic structure. Learn it once and you’ll never stare blankly at the cheese case again.
The 3-3-3-3 Rule
- 3 cheeses — one soft, one firm, one aged or blue
- 3 meats — one salty (prosciutto), one spicy (soppressata), one mild (a country pâté or salami)
- 3 sweet things — grapes, dried apricots, honey, fig jam
- 3 savory/crunchy — olives, marcona almonds, cornichons, mustard
Plus crackers or bread on the side (or nestled on the board if there’s room). That’s it. Follow this ratio and your board will be balanced in flavor, color, and texture every single time.
How Much to Buy
The single most common charcuterie mistake: buying too little (looks sparse) or way too much (looks messy and costs a fortune). Here’s the cheat sheet.
For an appetizer board
- About 2 ounces of cheese per person, total (across all cheeses)
- About 2 ounces of meat per person, total
- A small handful of accompaniments per person
For a meal-replacement board (the big one)
Double those numbers. Add bread, olives, and something substantial like a container of hummus or a small round of baked brie.
The Assembly Order That Makes It Look Effortless
Here’s where beginners lose the plot. Great boards are built in a specific order, and if you skip this sequence, everything looks either crowded or empty.
Step 1: Place the anchors first
Small bowls or ramekins for wet items (olives, honey, jam, mustard). Put them down first, spaced out across the board. They anchor the composition and give the eye places to land.
Step 2: Add the cheeses
Cut each cheese differently for visual variety. Soft cheese (brie) as a whole wedge. Firm cheese (manchego or cheddar) sliced into thin triangles or cubes. Aged or blue cheese in a chunky rustic wedge. Place them in a triangle pattern around the board — never in a line.
Step 3: Fold and drape the meats
Never lay meat flat. Fold prosciutto into loose ruffles (fold in half, then fold in half again into a rough fan). Fold salami into “salami roses” — line up four or five slices, roll them into a spiral. Or just fold each slice in half twice and stack. Place meats near — but not touching — the cheeses.
Step 4: Fill in with fruit and crunch
Bunches of grapes (leave them on the stem), dried apricots, whole strawberries, or figs. Nuts in the empty spaces. Small piles rather than scattered — piles look intentional, scatters look messy.
Step 5: The finishing touches
A sprig of fresh rosemary or thyme tucked between items adds instant garden-fresh polish. A few edible flowers if you want to show off. A light drizzle of honey over the blue cheese right before serving.
Step 6: Crackers and bread
Add these last, either along one edge of the board or fanned out in a small basket beside it. Adding them earlier just makes them go soft or get in the way.
The 5 Beginner Mistakes to Skip
- Cutting all your cheese into cubes. Boring. Vary the shapes for visual interest.
- Leaving too much empty space. A great charcuterie board looks abundant. If you see the board through the food, add more.
- Skipping the small bowls. Wet items on bare wood are messy and hard to serve.
- Buying only three colors of food. Contrast makes it beautiful. Add color with grapes, dried apricots, fresh herbs, olives.
- Assembling too early. Cheese needs to sit at room temperature for 30 minutes before serving, but the board itself should be built within an hour of guests arriving so it looks fresh.
Seasonal Boards That Always Impress
Summer
Fresh figs, watermelon cubes, peaches, burrata instead of brie, prosciutto, basil sprigs, a small dish of balsamic reduction, lemon-herb crackers.
Fall
Aged cheddar, pears, apples, walnuts, honey, dried cranberries, fig jam, seeded crackers.
Winter/Holidays
Baked brie in the center, dark chocolate, dried cherries, candied pecans, cranberry mostarda, rosemary sprigs.
Spring
Fresh berries, chèvre with edible flowers, prosciutto, honeycomb, radishes with butter, delicate wafer crackers.
The Move That Turns a Good Board Into a Great One
Personalization. A charcuterie board that arrives on a beautiful handcrafted piece with the host’s initials or family name engraved into the wood immediately becomes part of the memory of the meal. Our personalized acacia cutting board and personalized marble and acacia board are two of our most-gifted pieces because they turn every future gathering into a moment worth photographing.
The Bottom Line
Building a beautiful charcuterie board isn’t a skill you have to be born with — it’s a formula anyone can learn in an afternoon. Start with a great board, follow the 3-3-3-3 rule, assemble in the right order, and don’t forget the fresh herbs.
Ready to build your first one? Browse our handcrafted serving boards — each one is made in our Lincoln, California workshop, sized right for entertaining, and made to be the piece that makes your spreads look effortless for the next decade. Your future self at the next dinner party will thank you.